Tuesday, February 19, 2019

Almond Flour Bread


wow. wow. wow!

I cannot stop eating this bread!..

If you're like me and unable to properly process flour, you may be looking for alternatives that still feel like you're getting your carb-y fix.
I wanted something that checked off all the boxes:
Looks like bread
Tastes like Bread
Holds up like Bread

...and after trial and error (over and over again) I think we finally nailed it.

I used these Bread Loaf Pans I got on Amazon and always line with parchment paper 

I got a ton of questions about this Everything Bagel spice; I found it at Homesense! Wish I could link it for you guys.

More ways to enjoy this bread? 
Top with almond butter (add sea salt for extra fun!)
Top with Avocado and sprinkle everything bagel spice
Have it in the morning with your eggs
Top with peanut butter and banana slices
Ingredients
2 cups almond flour 
1/2  cup flax seed meal 
2 teaspoons baking powder
1 teaspoon baking soda
1/2 teaspoon salt 
1/4 cup coconut oil 
1/2 cup water
4 eggs;
Everything Bagel Seasoning (Found this at Homesense!!)

Directions 
Preheat oven to 350

Combine dry ingredients (almond flour, flax, baking powder, salt) 
Add warm water to coconut oil and mix. Add mixture plus eggs  to your dry ingredients and combine.
I mix with a fork and this has always worked well for me

Bake in oven at 350 for 30-40 mins 


Saturday, February 16, 2019

Walt Disney World: Planning

I've been promising this post for too long and I'm finally getting around to writing it.

I did a TON of research as I was planning Disney and probably read every single blog on the internet about tips and tricks to survive our first Disney trip.
Today I'll bring you along on the thought process behind where we stayed, if we liked it, if we would do it again and everything in between.

When to Go 

Peak season vs Non Peak. Whats the difference?
Crowds and Pricing 

I would use this amazing CROWD CALENDAR  from Undercover Tourist. It will help you identify the best time to go based on crowd levels. 
If you don't have children in school, I would definitely suggest you visit Disney during regular school days. Generally, any time there is a school holiday, there will be crowds at Disney World.

If crowds don't bother you, suggest the pricing - Disney now has Peak Pricing which means, busier times are more expensive to visit. 

The Canadian Resident 4 day offer is $316USD which works out to $79/day per person (Under 3 years old is free) and can be used any time of year except the week between Christmas and New Years. This offer is set to expire on March 15th 2019.  They may change the block out period before you buy, so definitely check that your dates still qualify. 
*Note: They have just released more special offers which roll into the summer. You can view them here
If you don't get the 4 day offer, I would suggest looking at low peak periods to save on park admission which can range from $109 - $129USD/per person per day. 

Here is a link to an admission price calendar so you can see the price/ ticket by day and plan accordingly. 

Would we travel again during the Holidays? I'm glad we got to visit Disney during Christmas because it's beauty was indescribable. Would I go AGAIN at that time? No. 
Next time we go we want to focus on experiencing the park with much less crowds 

Planning Flight + Hotel+Car 
We booked a FLIGHT+HOTEL+CAR rental through Sunwing Vacations 

When searching individually, I found the cost of a hotel, flight and car would have cost us WAY MORE had we not bundled it.
Make sure when you're searching that you know if you are booking an Official or Non Official Walt Disney resort. For example, Walt Disney World Dolphin Resort is not an official resort - and you won't get the perks like meal plans, free parking, magic hours, etc.

Did we book a Walt Disney Resort? No
We stayed at The Grove Resort in Orlando
Why? We thought the Resort was BEAUTIFUL; it had massive slides (both our kids were too young to enjoy them though), a lazy river, water park and more.
It was only a 10 minute drive to Disney
The price was great
We had a 2 bedroom, 2 bathroom condo with a full kitchen and laundry - THIS was the most important thing for us and was hands down the reason our trip was so successful with 2 toddlers.
Why?
1. Gabriel and Lucas had their own room and we had our own room which meant the kids would go to bed ON TIME every single night. If we were in a standard hotel room, this couldn't happen. Lucas would never be in bed at 6:30pm if the rest of us were up in the same room.  This meant we all got to enjoy the night while Lucas slept - this made for very successful days because Lucas was well rested. This also meant, once Gabriel went to bed, Tony and I got to stay up and drink wine, talk and hang out.
*We ordered a Pack N Play from the resort but remember to bring your own fitted crib sheet.

2. Meals were a breeze. The rooms have FULL kitchens (Fridge, Stove, dishwasher) Target was only a 5 mins drive away so on day 1 we stocked up. Cereal, crackers, cheese, yogurt, pasta, frozen pizza, fruit, veggies, eggs and bread were staples for the kids.

3. I did laundry which meant I could pack way less. One of my favourite tips from this vacation was do your laundry on your last night in the room. There is nothing worse than getting home from your vacation and having a HUGE pile of laundry. Tony and I ordered a pizza (from the Hotel restaurant -it was DELICIOUS btw), poured some wine, turned on a movie and did laundry on our last night. When I got home, I unpacked and put everything away. It made getting back into routine SO EASY.

Other Things we Loved
Parking was on the same floor as your hotel room. We were on the 5th floor and never having to get in an elevator from the parking garage was a luxury I never knew I was missing! We would park on the 5th floor and walk straight to our room.

Benefits to staying at a Walt Disney World Resort (remember, we didn't do this but I wanted to give you guys the most info for you to make a educated decision) 

Access to Disney Dining plan: $75.49 per adult and $25.75 per child per day
Keep in mind, the cost of a character lunch or dinner alone is $55/ adult SO...plan accordingly if this is something you want to do. 
We were actually happy we didn't get the meal plan. We did 2 character meals (1 breakfast and 1 lunch) and that was more than enough for us. All other meals were off property. 

Parking: Parking is free at each park if you are staying on Disney property.

Magic Bands: Magic Bands ($15) are free if you are staying on Disney property

Magic Hours - certain days open earlier or stay open later for anyone staying on Disney Property

Fast Pass - If you are staying on resort, you can book your fast passes 60 days before your stay. If you're not staying on resort, you can book them 30 days early.

For a Full list of resorts (organized by price point) click here

Some Things to Consider (That I didn't realize when I booked)
Parking at the resort is $15/day PLUS a resort fee of $30/day...that added up real fast.
We drove to Disney everyday so that was an addittional $25/day
...and yes..that's all in US dollars.
Resort Fee $30-7 =$210
Resort Parking= $15x7 = $105
4 Days at Disney Parking: $25x4 =100
TTL $415 USD ($550 CDN)

And don't forget your checked baggage fee of $30/checked bag each way
2 checked bags:
$30 x 2 = $60 each way
TTL $120 

Car Seats
$10/seat per day
7 days x 2 seats
TTL $140USD ($185CDN)

Thats an extra $855 in extra fees. CRAZZZZZZY

Car
Our car rental was part of the package with Sunwing but was from Alamo; a quick search on their website showed a coupon for a FREE car upgrade. I showed the clerk at the car rental when we arrived and he gave us the free upgrade.
Car Seats - we rented the car seats from Alamo at $10/seat per day. That added up quick and totalled $140US

*CAA Members get free car seat rentals with Alamo - CALL and ask if you can use this to your advantage on your booking. I found this out once I got home and was not happy with myself lol

*If you don't rent a car, make sure you Amazon Prime some groceries to your room. Especially bottles of water. Most (if not all) Disney resorts have at minimum a kitchenette in their room.


My Disney Experience App
Download this NOW! This will be your BEST FRIEND the entire trip.
All the parks have wifi so you can use the app to update your fast passes, access the map (with your current location), and so much more.
I couldn't do Disney without it.

I'm sure this post will evolve and I'll edit it as I think of more tips and tricks.
 Next Post will be all about what to pack!!
...and AFTER that I'll be doing a post per park.

THANKS FOR READING!!!
xoxoxox
Vanessa


Friday, February 15, 2019

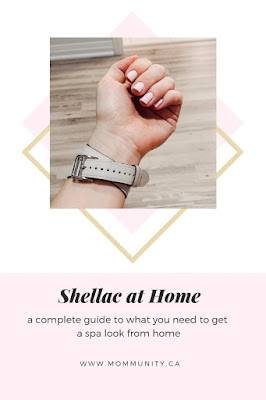
Shellac at Home


This week I shared on my instastories that I got a UV lamp and shellac polishes so I could do my nails at home.
I gave up on regular polish years ago because it doesn't stay on my nails longer than a few hours. That's when I started getting regular shellac done at the salon. I did this for YEARS but once Lucas was old enough to crawl, getting to a salon with both the kids was near impossible.

As a mom, my main priority is always my children but now that Lucas is one and I'm starting to feel like a human again, it's been so nice to start focusing on myself a bit.

You may have noticed my love for cooking and baking has reignited over the past few months (thanks to 2 naps, I do a lot of prep during nap time). AND finally, after years of letting my muscles go to mush, I am finally working out again.

When I was in my teens, there was rarely a day you would catch me without make up, a blow out and a nice outfit. Once I started university, I quickly gained a Freshman 25 (yup - 25 lbs in my first year of University), my cystic acne was at an all time high and I spent 95% of the time in baggy, unflattering clothes that aimed to cover up my new size.

At some point over that year I let go of myself and started to feel ok with feeling like crap.
I would stay up all night studying for exams that didn't get me higher than a 60% grade and writing essays that earned the same result. I was working 4 days a week at Holt Renfrew  (Thursday - Sunday) while maintaining a full course load in school.

I was exhausted.

I spent 4 years struggling for mediocre grades and lost myself somewhere in the process.

Enter motherhood; 10x harder than university with way more sleepless nights. I was perpetually tired, and my appearance showed it.

I maintained simple things like getting my nails done; in fact, that was always the one thing that made me feel good about myself when everything else felt like it belonged to someone else.

This may sound silly, but a fresh mani truly made me feel like my old self.


Since I can no longer get to the salon with 2 toddlers, I knew I needed to figure out how I could achieve the same look at home.

Thankfully, Amazon carries EVERYTHING and I was able to find everything you need  - and if you're like me, you'll be enjoying a glass of wine and an episode of The Bachelor to compliment your evening.

Thanks to tons of DM's from YOU amazing ladies, I got all the best tips to ensure you get the best at home mani.


#1. The Light 
I did SO.MUCH research before landing on this one. When I buy from Amazon, reviews are my best friend. So based on reviews - this guy won.
It can cure all types of UV and LED nail gels--e.g.Base Coat, Top Coat, Color Gel, Hard Gels, Builder, acrylic, sculpture gel, gem glue etc. No brand requirements.


#2 The Polishes 
At first, I bought this CND  colour called "Cashmere Wrap" but it didn't have prime shipping and wasn't sold by Amazon. I didn't even think to check different brands.
After I purchased, I continued to browse and found this  brand. Coming in at 1/3 of the price, I figured it was worth the try.
Boy, am I happy I took a leap of faith on that one! This colour is the most perfect pale pink. It's nice and opaque with few streaks. I did 2 thin coats to achieve the look I got on my first try.

 #3. Base Coat and Top Coat
Ok..before I even start talking about this, just know that the polish WILL be tacky on the base coat PLUS the colour polish. Once you add your top coat, everything will set. This is a no wipe top coat so once your hand comes out of that light, you're DONE!
The first time I did this, it was while sitting in the bathroom with both kids in the bath. As soon as I was done, I took them out and my nails were ready to mom.

I love this Base and Top Coat because it comes as a set AND it's prime shipping AND it's super cheap but works GREAT.

Those are the three things you don't have but need if you plan to do shellac at home.
You need a few more things that you may already have...but I'll list them here with links just in case.

Here's a Round up with links 
1. The Light 
4. A Nail Buffer  or you can get fancy and use this one
6. Acetone (you can normally find this at walmart for around $3) or this super convenient wrap that goes on your nails. At $16.99 with 200 pieces, you'll get 20 manicures out this. Definitely my top choice. 
These  wraps are easy to use and less messy than traditional acetone. 

And finally, a step by step guide to your shellac...


1. Remove polish. You can use your buffer or electric buffer to ensure your nails are clean of any polish or debris.

2. File your nails to your desired shape

3. Push back cuticles and use scissors to cut off any hang nails or dead skin 

4. Buff nails with a buffing block or electric buffer. Your nails should feel very smooth. This will make for a FAB polish application. 

5. Wash and dry your hands well 

6. Apply your first THIN layer of base coat

7. Put your hand under the light for 60 seconds (I use the 60 second button plus the heat button) 

8. Apply first THIN coat of polish 

9. Lamp for 60 seconds 

10 Apply second THIN layer of polish 

11. Lamp for 60 seconds
**Decide once you take your hand out of lamp if you want to add a third coat

12. Apply top coat 

13. Lamp for 90 seconds 

YOU'RE DONE!!! Add a moisturizing hand cream or oil to your hands to really make them look like  you just spent an hour at the salon. 


Monday, February 11, 2019

Valentine's Day Gifts for Toddlers and Babies

I was so late preparing for Valentines Day this year that I literally hopped on Amazon last night to pick up some last minute gifts for the kids.
Thanks to Amazon Prime, I'll get these by Wednesday

I don't know about you, but we have WAY TOO MANY toys in this house and with the winter we've been having, we have been staying indoors a lot.

This wipe clean workbook practices tracing and pen control - and since I don't have Gabriel enrolled in any prescool, I need to do my due diligence in preparing him for JK in September. I hope these books will help

You can purchase this here and if you grab it today you'll get Free Amazon Prime Shipping and have it by Valentine's Day


This Wipe Clean Early Learning Activity Book practices writing and number skills, spelling and math 


Lastly, I picked up a scissor skills activity pad to help with fine motor skills - this activity book will keep Gabriel occupied for hours and improve his confidence. Plus it comes with the scissors! 
Win Win!

For my 14 Month old, I got him some sorting toys because that seems to be what he is most interested in these days. 


And these stacking cups which will hopefully keep him out of my kitchen cabinets for a day or two haha


Saturday, February 9, 2019

A Little Beauty Round Up

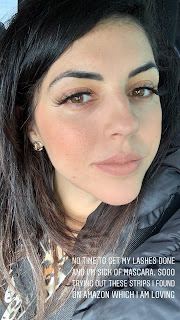
Since posting this Instastory this afternoon my DM's have been going wild over these $7 strip lashes. 

I L-O-V-E the look of lash extensions but with 2 young kids at home all day, carving out 2 hours plus travel time for lash fills became a thing of the past. 

I remember after all my extensions had fallen out, going back to mascara was the worst! 
1. it has always been the one aspect of make up I never enjoyed applying
2. No matter how well I washed my face, I always had mascara residue under my eyes making me look tired. 
3. I must have watery/oily eyes because no matter the brand, mascara always ran under my eye within a few hours. 

When we went to Florida last month I had found a set of lashes my friend Helai had given me for my birthday when she did my make up and tossed them in my luggage. Honestly, the idea of getting them on properly has always terrified me so I had never attempted. 

I purchased a glue I felt comfortable with and hoped for the best. 
*If you want a Prime option this glue is great (just doesn't have a brush) 


You can purchase this glue here

...You guys! I used them every single day of my trip! I was SWEATING walking around Disney for 4 days straight but they held up so well. The glue didn't come off at all and at night I just gently pulled them off and reapplied the next morning. 

I used them so much that I ripped them by accident when I was trying to clean them one day sooo I opened up Amazon and found these  lashes - 5 pairs for $7.98! 
You can purchase these lashes here

*These are showing a late ship date - I got mine next day but if you don't want to chance it, I'd suggest these.
Even if each pair lasts me a week, I won't need to replace for 5 weeks AND they didn't weigh my eyes down, they are comfortable to wear and although they are dramatic, I still feel like they look good for everyday use. 


NOOOOW.....
YOU GUYS!!! My other obsession that is LITERALLY CHANGING MY SKIN! 

My Microneedle....the best $21 investment I have ever made. 
I micro needle every Friday night and on Saturday morning my skin is GLOWING. I have noticed a reduction in lines, pigmentation and my skin looks overall healthier. 

After I micro needle, I apply a mask or hydrating moisturizer and head to bed (you will be RED! but in the morning, you will thank me). You can also apply a thin layer of coconut oil 
This micro needle DOES NOT break skin. 

You can purchase this here

Hope you enjoyed this quick beauty round up! I have found so many amazing beauty finds on Amazon. If this is something you want me to round up more often, just leave a comment and I'll make sure to do them more often. 

xox,
Vanessa

Wednesday, February 6, 2019

Our Jumping Castle

Hey friends!

Here's the link to the jumping castle we love!
It's on sale today - we've had ours for just about 2 years and use it indoors and outdoors. we love it!

You can find it here

Why Every Mom Needs an Endy - 100 Night Review

It’s been 100 nights since receiving my Endy Mattress and the results have been truly remarkable! Let’s start with the obvious – bef...